

Hello Craft Alliance Community!
This month at Craft Alliance, we’re looking past the blue recycling bin and into the world of creative reuse. While recycling is a great habit, upcycling—the process of transforming “trash” into something of higher value or beauty—is even better for our planet. It keeps materials out of the processing system longer, reduces the energy needed for industrial recycling, and sparks a level of imagination that a sorting facility just can’t match!
To celebrate, we’re challenging you to take a standard gallon milk jug and give it a second life as a charming Winter Snowman.
❄️ Beyond the Bin: The Upcycled Milk Jug Snowman Challenge! ☃️
Why Upcycling Wins
When we upcycle a milk jug, we aren’t just making a decoration; we’re practicing circular creativity. By reusing the plastic in its current form, we:
Save Energy: No industrial melting or reforming required.
Reduce Carbon Footprint: We bypass the transportation and processing energy of the local recycling plant.
Promote Resourcefulness: It teaches us (and our kids!) to see potential in the “ordinary” rather than always reaching for something new.
Your Canvas: The Milk Jug
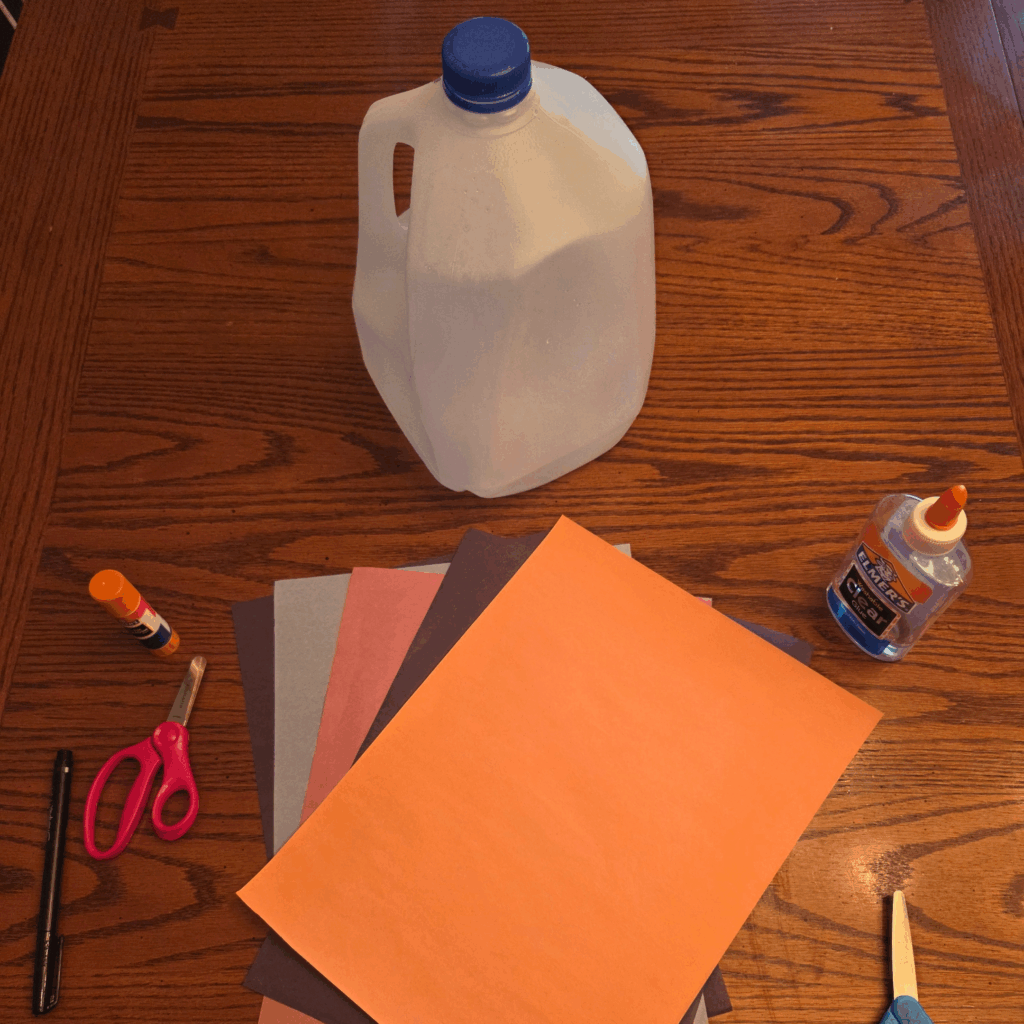
Start with a clean, dry gallon jug. From here, the direction you take is entirely up to you and the “treasures” you find around your house.
Option 1: The Classic Figure
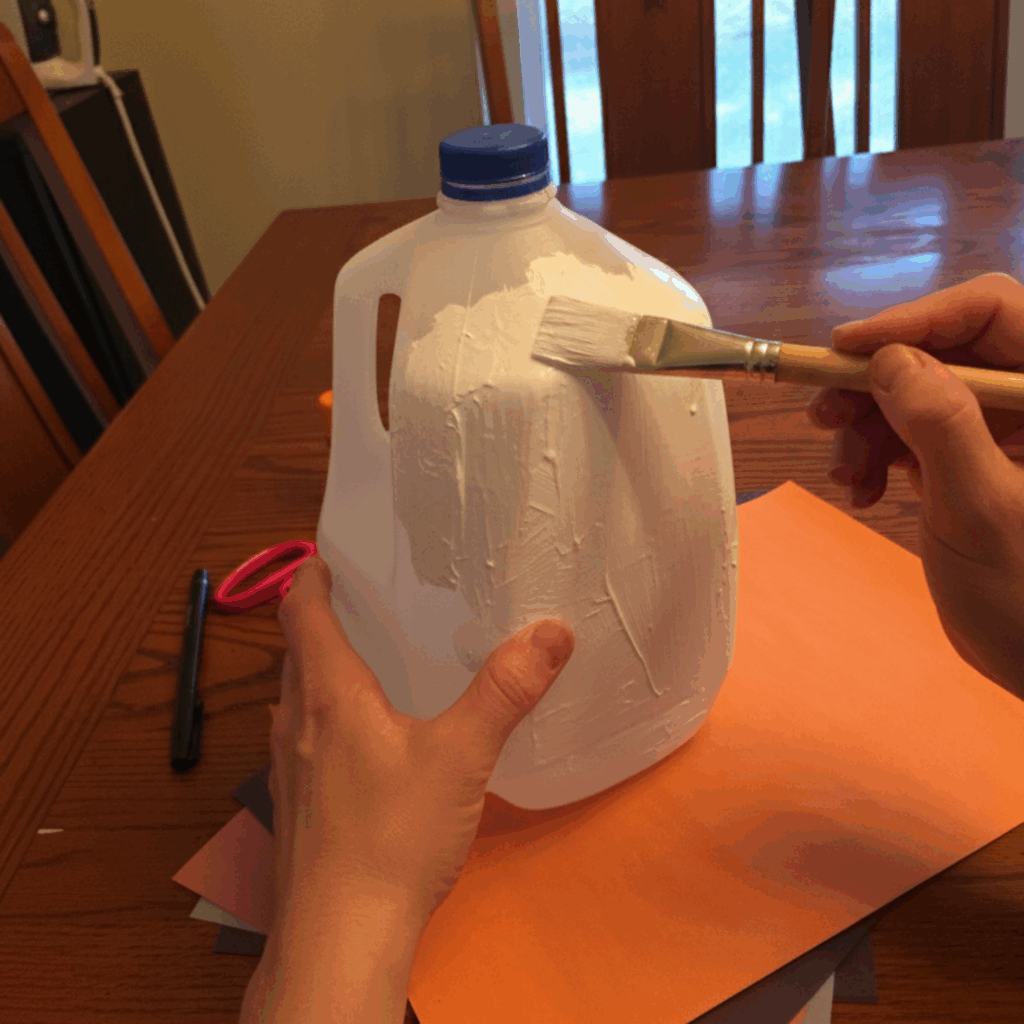
If you want a solid-looking snowman, give your jug a coat of white acrylic paint or even a layer of white tissue paper and glue for a “textured snow” effect.
Option 2: The Glowing Lantern
If you’d like your snowman to double as a winter light, keep the plastic clear! Its natural translucency is perfect for diffusing light. Just have an adult carefully cut a small flap in the back to tuck in some battery-operated fairy lights or a tea light.
Choose Your Own Adventure: The Decorating Kit
Forget the store-bought kits. The best snowmen are built from the “junk drawer” and the scrap pile. Here are some ideas to get you started:
1. The Face & Personality
Found Objects: Use bottle caps, large buttons, or even dried beans for eyes and a mouth.
The Nose: Try a rolled-up piece of orange paper, a painted wine cork, or a small twig.
2. The Winter Wardrobe
Textile Scraps: Dig through your rag bin! An old mismatched sock makes a perfect beanie (just tie off the top with string), and a strip of a worn-out flannel shirt makes a dashing scarf.
Nature’s Touch: Use sturdy twigs from the yard for arms to give your snowman a rustic, organic feel.
3. The Finishing Touches
Biodegradable Sparkle: If you want some shimmer, try using a bit of coarse salt or sugar glued to the surface instead of plastic glitter.
The Base: If your snowman feels top-heavy, add a handful of pebbles or sand inside the jug before you seal it to give him some “boots.”
Step 1: Build Your Base
Start with a clean, dry gallon milk jug. This is your foundation.
The Classic Look: Use white acrylic paint or white tissue paper and glue to give your snowman a solid, snowy appearance.
The “Glow” Option: If you’d like your snowman to double as a lantern, leave the plastic bare! Its natural translucency is perfect for diffusing light. Have an adult cut a small flap in the back to tuck in battery-operated fairy lights.
🌟 Upcycle Bonus Points: Instead of new paint, use white packing paper from a recent delivery or shredded office paper to “stuff” the jug from the inside for a textured, snowy look.
Step 2: Design the Personality
Now it’s time to give your snowman a face and some character.
Standard Materials: Grab your googly eyes, orange construction paper for a carrot nose, and markers to draw on a coal-style smile.
Assembly: Use craft glue or a low-temp glue gun (with adult supervision) to secure everything in place.
🌟 Upcycle Bonus Points: Look for mismatched buttons, bottle caps, or painted wine corks for eyes and noses. For a rustic touch, head outside and gather real twigs for arms instead of using pipe cleaners.
Step 3: Style the Winter Wardrobe
Every snowman needs to stay “warm”! This is where you can add color and flair.
Standard Materials: Use felt sheets, spools of ribbon, or glitter to create a custom hat and scarf.
Stability: If your snowman feels top-heavy, add a bit of white craft sand inside the jug to keep him standing tall.
🌟 Upcycle Bonus Points: Raid the “single sock” bin! The cuff of a mismatched sock makes a perfect beanie (just tie the top with string), and a strip of a worn-out flannel shirt or an old t-shirt makes a dashing scarf. To add weight, use pebbles or gravel from the driveway instead of store-bought sand.

Did You Know? The Power of Upcycling ♻️
-
Plastic’s Long Life: A single plastic jug (made of HDPE or PET) can take up to 450 years to decompose in a landfill. By upcycling it into a decoration you reuse annually, you’re preventing centuries of waste (Source: WWF Australia / Chariot Energy).
-
Energy Savings: While recycling plastic saves about 88% of the energy required to make new plastic from raw materials, upcycling saves even more by skipping the industrial melting and reforming process entirely (Source: U.S. Energy Information Administration / Dwij).
-
The “Wish-cycling” Trap: “Wish-cycling”—putting non-recyclables in the bin—can contaminate entire batches of good material, leading them to be rejected and sent to landfills. Upcycling at home is a 100% guarantee that the item stays out of the waste stream (Source: Routeware / Sustainability Directory).
-
Carbon Impact: Reusing textiles (like those “Bonus Point” sock hats!) is highly effective; upcycling just one ton of textiles can save roughly 20 tons of CO2 (Source: Dwij Products).
Sources & Further Reading
If you’re interested in the science and data behind our Crafting Rainbow upcycling initiative, check out the resources we used to compile our “Did You Know?” facts:
Decomposition Rates: For data on how long HDPE (High-Density Polyethylene) plastics like milk jugs last in landfills, see WWF Australia: The Life-Cycle of Plastics.
Energy Savings from Recycling: To understand the energy required to process recycled plastic versus raw materials, refer to the U.S. Energy Information Administration (EIA): Plastic Recycling Energy Data.
The Problem of Contamination: To learn about “Wish-cycling” and how it impacts local sorting facilities, read Routeware: What is Wish-cycling?.
Textile Upcycling Impact: For information on the carbon footprint reduction associated with reusing fabrics and socks, consult Dwij: Environmental Impact of Textile Upcycling.
Plastic Lifespan: Additional data on the 450-year lifespan of PET and HDPE plastics can be found via Chariot Energy: How Long Does It Take for Plastic to Decompose?.